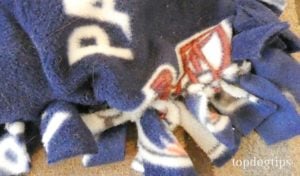
A high quality dog bed can be quite expensive, especially if your pooch is very big. Cheaper dog beds look generic, and they are usually made with poor quality materials. If you're looking for an inexpensive bed that you can customize to be exactly what you want, try learning how to make a dog bed like the one below.
Some dogs like to snuggle up in a nest-like bed, while others enjoy sprawling out with their belly in the air. No matter how your dog likes to sleep, chances are you know his sleeping style. This means you also know the type of dog bed that would best meet his needs.
Learning how to make a dog bed also allows you to use any material of your choosing. You can find an outer material that will fit in nicely with your home's décor or a flashy material that shows off Fido's personality. You can also stuff the inside with a soft, plush material or durable memory foam.
The materials that you choose will affect the cost of the bed. For example, if you use memory foam to stuff your DIY dog bed, it's going to cost more than using soft, plush material. Likewise, a higher quality outer material will cost more than a lower quality material.
How to Make a Dog Bed Without Sewing
 Materials Needed
- Fabric
- Material to stuff the bed
- Scissors
- Fabric marker
- Ruler
How To Make A Dog Bed
The first thing you'll need to do when learning how to make a dog bed is decide what size would be best for your pet. Of course, I made this bed for one of our dogs, but you could make one for your cat, rabbit, ferret or any other pet that may need a soft place to sleep.
Measure your dog's length from nose to tail. Measure your dog's width when laying down (and stretched out) from the top of his shoulder blades to the end of his paws. You'll also need to take his head into consideration.
 Once you have the measurements you want, add 8″ to the length and width. For example, if you want a dog bed that is 40″ x 50″, your final measurements will be 48″ x 58″. Cut 2 pieces of material that are size you need.
Now, lay the two pieces on top of each other with the front of each piece facing outward. As you will see in my video guide above, the next step when learning how to make a dog bed is to cut 1″ wide slits along all 4 sides of the fabric. These slits will be 4″ long, which is why you need to add 8″ to the length and width in the beginning.
RECOMMENDED: 7 DIY Dog Bed Project Ideas and Guides
 As you will notice, you'll need to cut a square out of each corner. As you go around cutting your 4″ x 1″ slits, the corner slits will line up, and you'll easily be able to cut a square from each corner.
Assembling your dog bed is quite simple. As the title of this article suggests, learning how to make a dog bed like this one requires no sewing. All you have to do is tie the coordinating fabric slits together. Tie the slits together all the way around the bed, but leave enough space to stuff the bed.
Fill the bed with the material that you chose. Tie off the remaining strips and your DIY dog bed is ready! Your dog may not want to lay on it immediately, because it smells new. But, I'm sure Fido will be snoozing away once he's had some time to get used to his new bed.
READ NEXT: How To Get Your Dog To Sleep On A Dog Bed


