


Table of Contents
Every dog owner understands that sometimes, a man’s best friend makes a bit of a mess in the backyard.
Depending on the size of your pup, this mess can quickly add up to a messy backyard.
On top of that, having to use a plastic bag to pick up the poop, disposing of it in plastic bags, sitting in landfills for years – isn’t environmentally friendly.
Consider implementing a dog waste composter if you’re looking for an environmentally friendly method of disposing of your dog’s waste.
A word of caution: a commitment to understanding safe temperatures and pathogen testing to use a dog waste composter is necessary.
Always make sure you look into different techniques thoroughly before beginning. Always make sure that any composter is kept well away from streams, groundwater, and edible fruit crops.
Any compost created from dog excrement should be used on ornamental plants only.
It’s important to remember that a number of parasites are found within our pet wastes, which may not be killed off in household compost piles.
To kill any parasites, a temperature of 165 Fahrenheit needs to be maintained for five consecutive days.
Roundworms (one of the most common pests) can continue to persist in the compost, which may be ingested. These and their eggs can survive and hatch within the human intestine.
Additionally, a condition called Visceral Larval Migrans can develop. Ensuring proper heat temperatures is mandatory to prevent such parasites from thriving in the compost.
 Do it Yourself Method 1
This method is designed to have a bucket hold the waste within the ground, using a large plastic drum with a lid that seals.
It sits in the ground flush with the landscape and allows the excrement to break down over time.
You’ll need the following products to create the DIY Dog Waste Composter:
- A Shovel
- A large plastic drum with a lid (the lid must seal)
- Electric drill to insert holes in the side of the drum
- A heavy-duty saw to remove the base of the drum
- A bag of medium-sized pebbles (to assist with water drainage)
- A micro-organism starter containing minerals, wheat, and sawdust (to help break the dog waste, eliminate the smell, and kill any pathogens)
To Create Your Dog Waste Composter
Locate an area within your yard that is away from all water sources and edible plants and out of the way of any foot traffic (the last thing you want is someone falling in your compost bin).
You’ll need to dig a hole in the drum’s size, so make sure you have space on either side of the composter.
Using the drum lid, mark out the area you’ll need to dig out. You’ll want the drum to fit snugly within the hole, up to the top of the drum.
When digging out the hole, ensure only the top of the drum sticks above the surface.
Take your drum and carefully use the drill to add holes to the sides. You’ll want the holes on the bottom half of the drum only, or the smell will seep into the air.
Make sure to add plenty of spots for drainage. At the base of the drum, drill holes around the entire base.
These holes will make it easier to see through to remove the bottom.
Once the holes are drilled, carefully use your saw to remove the bottom edge of the drum.
Place the drum inside the hole and ensure it is level and straight. Add the pebbles to the bottom of the container for drainage and carefully fill in the sides of the drum to ensure it fits snugly and doesn’t move around.
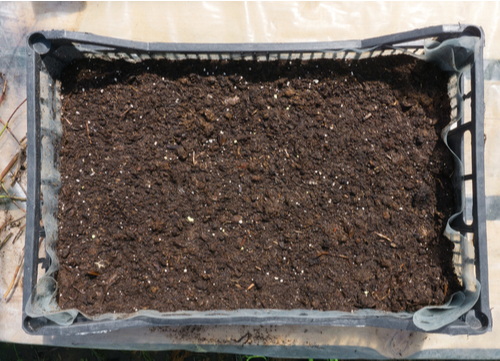
To start your compost, add a few inches of rich compost from your vegetable compost bin. Doing this will expedite your dog waste compost, helping to break down the waste faster.
If available, add some worms to your mix as well.
To maintain your dog waste compost, simply add your micro-organism starter every time you add waste to the bin.
As the waste breaks down, the bucket should remain half full. If you need to move or empty the compost, remove the bucket.
To remove the bucket:
- Use your shovel to loosen the dirt around the drum gently.
- Grab either side of the drum and pull straight up.
- Leave the rocks, micro-organism starter, and waste in the hole and gently fill it in.
 Above Ground Dog Waste Composter
If you prefer to have a composter above ground, consider using two bins with the following method:
You’ll need to use two bins (one for the compost and the other for actively composting materials. You’ll also need a long-stemmed thermometer and water.
It’s essential to have nitrogen-rich and carbon-rich materials when you start your composting project.
Nitrogen-rich materials are often considered the “wet” source of materials. They include dog waste, yard clippings, vegetable waste, and grass clippings.
The carbon-rich materials include the “dry” components. These could consist of products like shredded newspaper, hay, straw, or sawdust.
Building Your Above-Ground Dog Waste Compost
Using an electric drill, add holes to the drum or container that will hold your compost.
It’s essential to place this container in a warm, sunny, and dry area.
When you add the dog poop to the bucket, you’ll want to add a layer of carbon materials (the sawdust, for example). Take care to mix thoroughly every time you add to the container.
If you’d like to speed up the breakdown of aged compost, simply add a shovel full of old compost and mix again.
When starting the composting project, soil or vegetable compost can be used instead. It’s essential to keep the pile moist.
Add small amounts of warm water to the pile, as needed, until the texture mimics a wet sponge.
Once the bucket is full, cover the container with a sealed lid. By sealing the container, you’ll allow the microbes to break down the waste.
After approximately two weeks (or when the temperature begins to decline on the compost), turn the pile thoroughly.
It’s important to remember that finished compost should be allowed several months to cure before using it.
 Composting Dog Waste with Composting Worms
(A word of caution: If you happen to give your dog a worm pill, using composting worms will not be an effective method of compost. The medication will kill the worms in the bucket as they decompose the waste. All versions of this medication will impact the health of your worms; it includes any monthly prescription or generic chewable tablets. If your dog regularly consumes the heart-worm pill, leave any feces for at least two weeks before adding it to the compost bin. Alternatively, you may want to use other methods mentioned above for your compost technique).
Similar to the other methods mentioned above, composting dog waste with worms is an excellent way to eliminate the need for countless plastic bags while still having compost.
It’s important to note that establishing a worm bin for dog waste does need to remain separate from the other food compost you may have.
This is particularly true if you intend to use vegetable compost for seedlings or edible plants.
It’s also important to separate the two items, as when given the opportunity to eat dog poop or vegetables, the worms will almost always opt for the vegetation.
Getting Started
To get started, you’ll want to cut the bottom off your container and drill holes into the side (as previously mentioned above).
This allows proper flow and drainage, as well as preventing a gas build-up inside the container. You’ll want to dig a hole for the container in a less-trafficked area outside.
Keep the container level with the ground, allowing the lid to be placed on the container without obstruction.
Secure the bucket into the ground by filling it around the bucket with loose soil. Add a few inches of draining pebbles to the bucket.
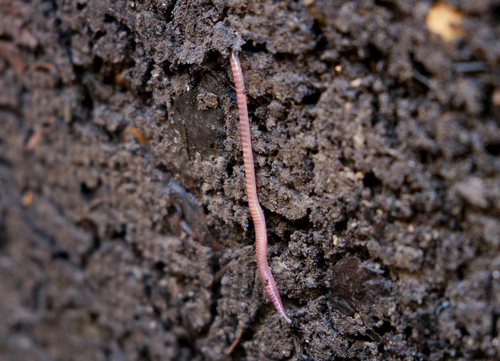
You’ll also want to ensure that a few handfuls of composting worms are added to the bucket. (Note: composting worms are different than earthworms).
Ensure that any dog feces are picked up using newspaper or biodegradable materials and add them to the container.
As the worms are not trapped within the bucket, they are free to leave and return whenever they want.
It also allows any other insects or organisms to enter the container from the bottom too.
As you continue to add the waste, it’s important to add a carbon source (which would be fulfilled by the newspaper or toilet paper).
Leaves, grass cuttings, or newspaper is a wonderful source of carbon.
Once your bucket fills up, it’s important to remember that the waste at the top will be less composted than at the bottom.
As such, you can either leave the compost for a few weeks or simply remove the bucket and fill in the pile with soil.
Likewise, it may be wise to start a second composting station for the new waste while the old bucket has time to decompose.
Frequently Asked Questions:
Is Dog Poop Compostable?
Much like other biodegradable materials, dog waste is compostable. It’s important to make sure you take precautions to ensure you’re composting the waste properly.
When the average dog creates approximately 1/3 of a pound of waste per day, compost can quickly establish an inexpensive disposal method.
Can I use dog waste in my vegetable gardens?
Many parasites and bacteria that live in dog waste (including E. coli and salmonella, ring, and tapeworms) can survive during the composting process.
In fact, it can live in soil for years. As such, it’s important to keep dog waste away from any consumable plants or areas with other animals.
Does composting reduce the amount of waste product?
Yes, composting can reduce the quantity of dog waste by 50 percent!
When allowed to compost using the underground method, many owners never fill their compost bins due to the waste's expedited breakdown.
Wouldn’t Dog Waste Compost Smell?
Surprisingly, no. As most of the above methods involve the waste remaining underground, the smell is dispersed with the gas underground.
It’s important to remember to only drill holes on the lower half of the container/drum. The higher up you drill the holes in the bucket, the more likely the smell will transfer above into the yard.
By firmly replacing the soil around the bucket, you’ll also reduce the amount of smell.
It’s important to remember that there may be a notable smell when you remove the bucket from the ground.
This smell is only temporary and will resolve once the top of the compost is covered by soil.
If you notice a strong smell from your compost bin, you may need to bury the bucket into the ground or simply add more carbon-rich materials.
Can I compost my dog waste in the winter?
In short, it depends. It’s important to remember that composting requires heat to successfully break down the waste.
In the event you are using the compost in a cool or frigid environment, the breakdown process will take exponentially longer.
Likewise, composting worms are unable to survive harsh or freezing winter environments. They are surface dwellers and don’t burrow for warmth.
Although the eggs should survive for the following season, extended periods of frost or cold may require replenishing the worms in the warmer months.
Final Thoughts
Although we all love our furry companions, it’s hard to ignore the environmental impact they can have on our daily lives.
For those looking to limit their footprint on the Earth, dog waste compost may be an economical and environmentally friendly application.
Although biodegradable bags are specifically designed for dog waste, it’s important to remember that many of these bags were designed to decompose slowly (often over six months).
That’s why we recommend using paper products or newsprint to collect dog waste instead of using plastic or biodegradable bags.
If compost is not for you, biodegradable bags are a wonderful alternative to the plastic bags typically used by dog owners.


